Under-cabinet lighting — the strip or bar-style fixtures mounted to the underside of your upper cabinets to illuminate the countertop below — might be the single most underestimated detail in a kitchen renovation. Done right, it makes food prep genuinely safer, makes your countertop materials look better in photographs and in person, and signals finished craftsmanship to anyone who walks into the space. Done wrong, you end up with a dangling cord tucked behind a paper towel holder or a wiring job that requires re-opening the wall after the tile is already in. The decision you’re really making here isn’t just about fixtures — it’s about when in your renovation sequence you commit, what your cabinet configuration looks like, and whether this kitchen will be yours to keep or someone else’s to buy. This article walks through both installation types, names the real tradeoffs, and gives you a clear decision rule you can apply to your current project.
| EDITOR'S PICKAnsen Hardwired Under Cabinet L… | Mid-tierRavinte 25 Pack Solid 5 Inch Ki… | Budget pickLeetdud Under Cabinet Lighting… | |
|---|---|---|---|
| Power source | Hardwired | — | Plug-in |
| Fixture length | 48 in | — | 16 in |
| Color temps | 5 (2700–5000K) | — | 3 (3000–5000K) |
| Dimmable | ✓ | — | — |
| CRI | >92 | — | — |
| Linkable | — | — | ✓ |
| Price | $59.99 | $45.41 | $19.99 |
| See on Amazon → | See on Amazon → | See on Amazon → |
The Core Tradeoff: Permanence vs. Flexibility
Hardwired under-cabinet lights connect directly to your home’s electrical system — no plug, no visible cord, no outlet required beneath the cabinet. The fixture tucks against the cabinet bottom and feeds through the cabinet interior or wall cavity to a switch or junction box. Plug-in fixtures, as the name says, terminate in a standard plug that goes into a receptacle; the only visible element (if you route the cord carefully) is the fixture itself and a short run of wire disappearing into a cabinet or along the wall.
That gap in finish quality is real. This Old House, in their guidance on under-cabinet lighting installation, identifies cord management as the primary visual liability of plug-in setups in high-finish kitchens. If your uppers are running to the ceiling or you have a tile backsplash that makes surface-mounting a cord painful, hardwired is almost always the cleaner path. If you have open countertop runs, existing outlets beneath the cabinets (common in post-2000 construction), or you’re working in a rental or flip context where reopening the wall isn’t on the table, plug-in can absolutely look professional with the right fixture and a few minutes of cord routing.
The installation complexity gap has also narrowed considerably. Aggregated owner reviews on Houzz consistently show that buyers with no prior electrical experience are completing hardwired installs cleanly — the learning curve is mostly about comfort with turning off the breaker and making wire-nut connections, not about any specialized skill. Family Handyman’s under-cabinet lighting coverage notes that most hardwired retrofits don’t require opening walls at all if you route through the cabinet interiors and use a surface-mounted driver hidden inside the cabinet box.
Hardwired, Plug-In, or Linkable: A Side-by-Side Look
Before diving into each option in depth, here’s how the three main configurations compare across the factors that matter most for a kitchen renovation.
Hardwired Permanent Installation
A hardwired setup feeds directly from your home’s wiring — typically tapped off an existing circuit at a junction box or wired to a dedicated switch leg. No outlet is consumed, no cord is visible, and the finished result is indistinguishable from a factory-installed fixture. The tradeoff is sequencing: hardwired work belongs in the project timeline before tile is set and drywall is painted. Retrofitting after the fact is possible but adds meaningful labor, especially if wall penetration is required.
For resale contexts, hardwired under-cabinet lighting reads as “designed into the kitchen” rather than “added after the fact.” Apartment Therapy’s coverage of kitchen upgrade return on investment consistently ranks under-cabinet lighting among the lower-cost, higher-perception improvements a seller can make — and hardwired execution is what earns that perception premium.
The fixture to anchor this conversation is the Ansen hardwired under-cabinet light bar. Owners who have reviewed it consistently praise two things: the five selectable color temperatures (ranging from a warm 2700K glow up to a crisp 5000K task-light white) and the raw brightness, which reviewers repeatedly describe as genuinely adequate for food prep rather than the dim ambient wash common to underpowered LED strips. A retired union electrician who reviewed it called the installation straightforward for anyone comfortable with basic wiring. One important placement note from the reviews: light output on the 48-inch bar skews toward one side rather than distributing perfectly evenly across the full length. Center your placement over the primary work zone rather than splitting the cabinet run evenly.

Ravinte
$45.41
In stock on Amazon
Check price on AmazonDirect-Replacement Plug-In for Fluorescent Retrofits
Plug-in under-cabinet lighting gets unfairly dismissed as the budget or temporary option, and that reputation isn’t fully deserved. For rental properties, flips where you’re not touching the walls, or kitchens where outlets already exist beneath the upper cabinets, plug-in is faster and cheaper to install — and with the right fixture, visually clean enough to pass a showing.
The Nicor 33-inch under-cabinet LED fixture has a specific owner-validated advantage worth calling out: multiple reviewers replacing old fluorescent under-cabinet bars note that the mounting screw spacing lines up with the existing holes from the fluorescent fixture. On a flip or rental-unit refresh where you’re replacing a tired 2005-era fluorescent strip, that detail means you’re not filling old holes, drilling new ones, or working with toggle bolts in a cabinet bottom that has already been compromised. Owners specifically praise it as a drop-in replacement — pull the old fixture, hang the Nicor, plug it in. Total install time on a straightforward swap runs under 20 minutes per fixture by reviewer account.
Leetdud
$19.99
In stock on Amazon
Check price on AmazonLinkable LED Bars for Multi-Cabinet Plug-In Runs
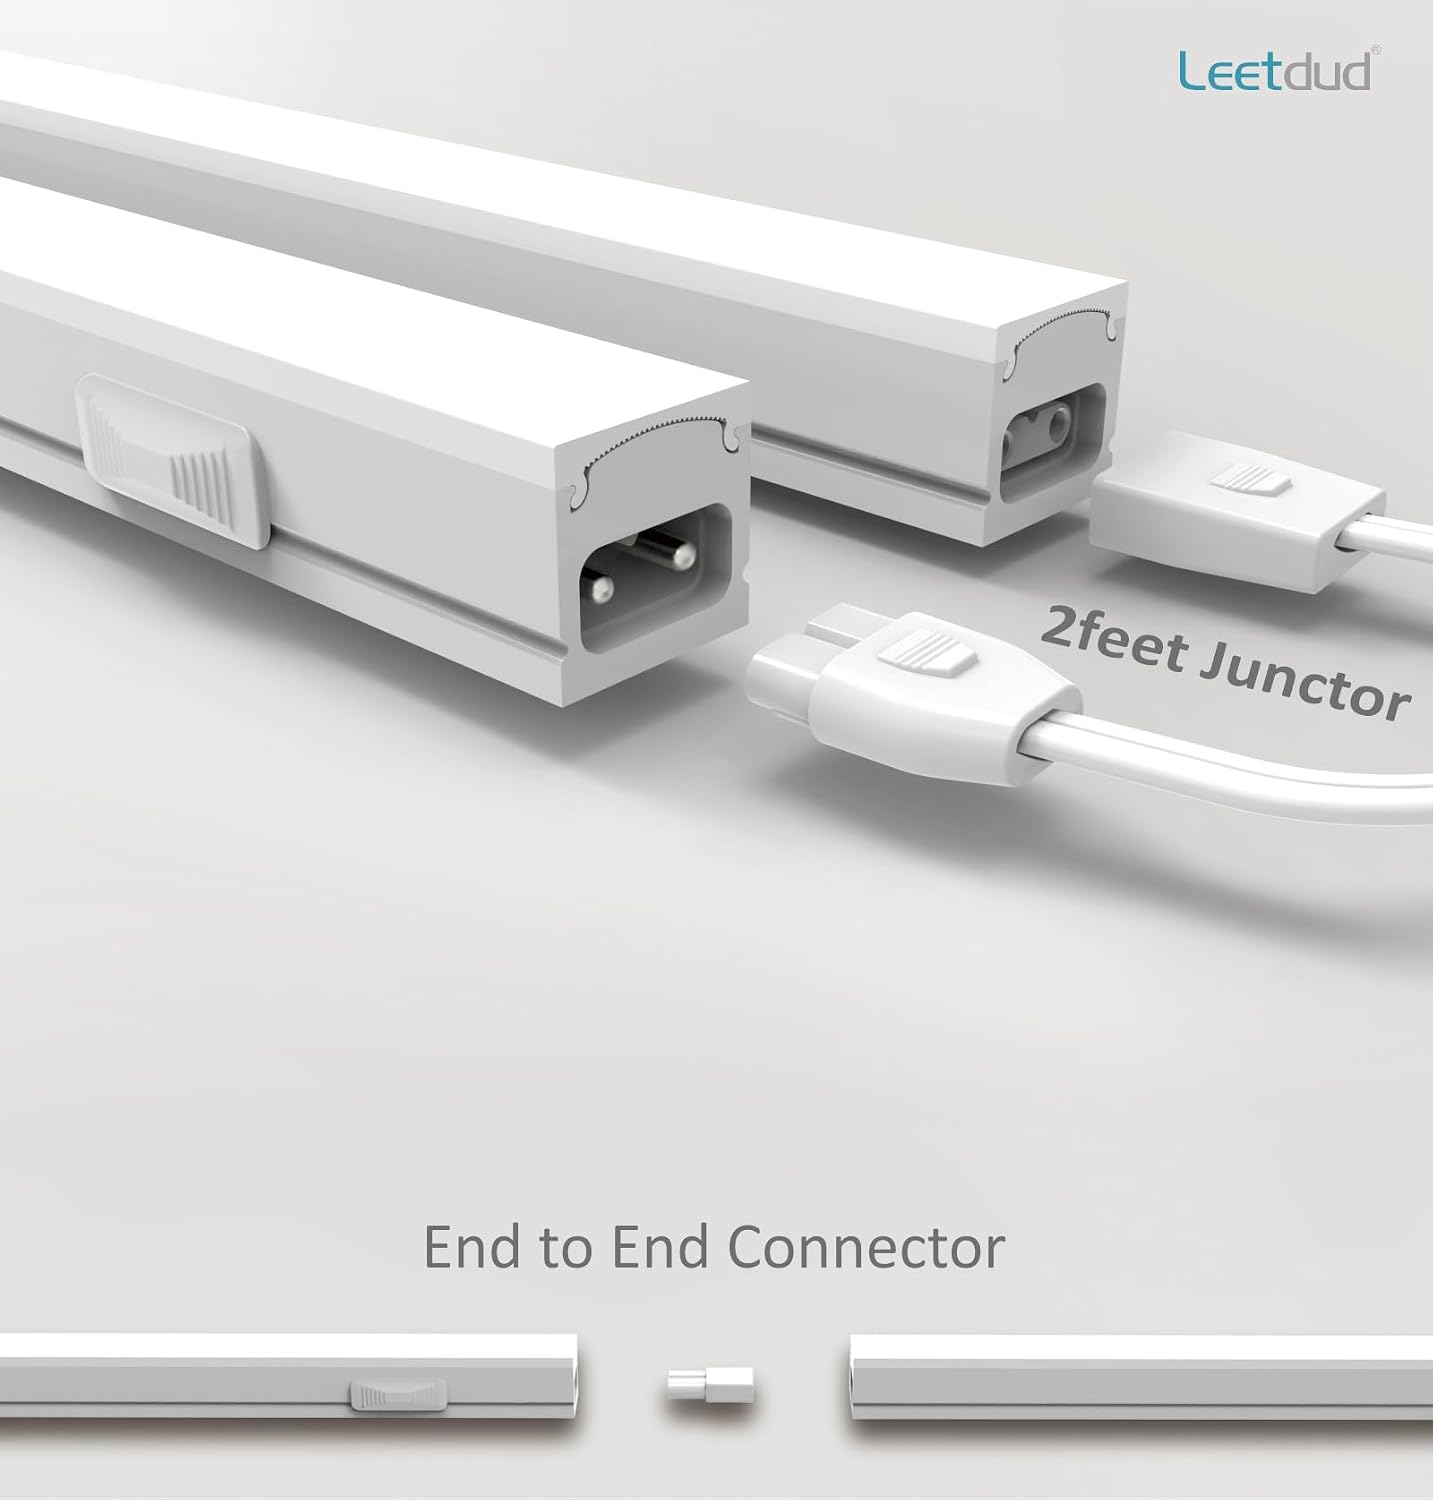
For runs covering multiple cabinets, the cord-multiplication problem is what makes plug-in installs look messy. The Leetdud linkable plug-in LED bar is built to solve exactly that. The linkable design lets you chain multiple bars together and terminate the entire run in a single plug — one outlet, one cord to manage, however many linear feet of light you need.
Owners consistently praise this configuration for simplifying multi-cabinet installs. Two notes from the reviews worth passing on: the included adhesive tape is flagged by multiple buyers as insufficient for long-term adhesion on its own, so use the included mounting hardware as your primary attachment method and treat the tape as positioning help during the install only. Also confirm the outlet location before committing to cord length — the single-cord benefit only works cleanly if the outlet is positioned at one end of the run rather than in the middle.
Leetdud
$19.99
In stock on Amazon
Check price on AmazonBy the Numbers: Rough Project Cost Comparison
The cost difference between hardwired and plug-in installs is real, but it lives primarily in the labor column rather than the fixture column. Here’s how a representative 10-foot, three-fixture run pencils out at mid-2026 pricing:
| Configuration | Fixture Cost | Labor (DIY) | Labor (Electrician) | Outlet Consumed |
|---|---|---|---|---|
| Hardwired (e.g., Ansen) | $120–$180 | $0 | $150–$350 | No |
| Plug-in direct (e.g., Nicor) | $90–$150 | $0 | N/A | 1 per fixture |
| Linkable plug-in (e.g., Leetdud) | $90–$140 | $0 | N/A | 1 for full run |
Fixture ranges reflect mid-market LED bars at May 2026 pricing. Electrician labor estimate based on regional service-call rate guidance from Family Handyman’s cost coverage for light fixture installation.
The labor estimate for a hardwired install requiring wall penetration or a new switch leg reflects a simple retrofit — a single electrician visit to make connections and verify the circuit. If your install requires a new circuit, panel work, or a permit, scope and cost increase accordingly. This Old House’s installation guidance recommends confirming with your local building department whether a permit is required before beginning hardwired work, as requirements vary by jurisdiction.
Making the Call: A Decision Framework
Here’s the honest if-then framework after reading through the specs and aggregated owner feedback:
If the kitchen is a long-term personal renovation and you’re mid-project before tile sets: Go hardwired. The Ansen fixture covers the feature set you’d want — color temperature options, real task-light brightness — and owner reviews confirm the install is manageable without a licensed electrician if you’re comfortable with basic wiring. This Old House and Family Handyman both cover the process in step-by-step detail for a DIY audience.
If you’re replacing fluorescent under-cabinet fixtures on a flip or rental refresh: The Nicor 33-inch is the call. The mounting footprint compatibility with standard fluorescent bars is a documented labor-saver, and plug-in gets you done fast without touching the wall.
If you have multiple cabinets to cover and one outlet to work with: The Leetdud linkable system is built for exactly this configuration. Use the mounting hardware, not just the tape, and position your outlet at one end of the run before you start chaining bars.
If you’re a contractor sourcing for multiple concurrent jobs: Spec hardwired on any kitchen where walls are open or tile hasn’t set. Flag plug-in as the default for tenant-occupied units, quick-turn flips, and any kitchen where outlet placement already works. Make this decision at the cabinet layout review — not at the fixture-purchase stage.
Frequently Asked Questions
Can I link multiple Leetdud bars together into a single plug? Yes — that’s the core design feature. Leetdud bars are built to daisy-chain, so you run connecting cables between each fixture and terminate the entire run at one plug. The practical limit is the wattage rating of the chain; check the manufacturer spec sheet for the maximum number of linked bars before planning a very long run.
Does the Ansen fixture require a wall dimmer, or does it have its own controls? Based on published specs and owner reviews, the Ansen has onboard controls for both brightness and color temperature — you don’t need a compatible wall dimmer to access those functions. Owners specifically call out the onboard controls as a convenience, particularly for switching between warmer and cooler color temperature settings without touching the wall switch.
Will the Nicor 33-inch fit the same footprint as a standard fluorescent under-cabinet fixture? Multiple owners confirm the mounting screw spacing matches standard fluorescent under-cabinet bars, making it a direct physical replacement in most cases. This is the most consistently praised detail in Nicor 33-inch reviews — it isn’t a guarantee for every fluorescent model ever manufactured, but the pattern in owner accounts is strong enough to treat as a reliable expectation for common residential fluorescent strips.
How warm does 3000K actually look compared to incandescent? 3000K is warm white — noticeably warmer than the neutral or cool white most LED fixtures default to, but slightly crisper than a traditional incandescent bulb, which runs around 2700K. Apartment Therapy’s kitchen lighting coverage describes 3000K as a sweet spot for task lighting that reads warm and inviting without feeling yellow or dated. On a white or light-colored countertop, 3000K will flatter the surface without casting an orange tone.
Do any of these work without a wall switch — just always-on when plugged in? Plug-in fixtures like the Leetdud and Nicor are always-on when the outlet is live, unless you plug them into a switched outlet or use an inline switch (often included or available as an accessory). Hardwired fixtures tie to whatever switch they’re wired to. If you want lights available any time the outlet has power — useful in rentals or for always-available task lighting — plug-in to an unswitched outlet is the simpler path.
Is hardwired installation something a non-electrician can realistically do? Based on the pattern across owner reviews for hardwired under-cabinet fixtures including the Ansen, yes — reviewers with no prior electrical experience consistently report clean installs. The key steps are turning off the breaker, making wire-nut connections (hot to hot, neutral to neutral, ground to ground), and routing the feed wire through the cabinet interior to a junction box or switch leg. This Old House and Family Handyman both cover the process in detail for a DIY audience. If your install requires a new circuit, a permit, or panel work, that’s a different scope — but a standard retrofit to an existing switch or outlet is well within non-electrician territory.