If you’ve ever finished installing a beautiful run of cabinets — stock, RTA, or semi-custom — and then realized the countertop underneath is perpetually in shadow, you already know the problem rechargeable under-cabinet lights solve. These are small, self-contained LED fixtures (LED stands for light-emitting diode, basically a highly efficient chip that produces light without a hot filament) that mount to the underside of your upper cabinets without running any new wiring. Most have a built-in rechargeable battery — the same technology as a smartphone — and many add a motion sensor that flips the light on when you walk past and off when you leave. The pitch is compelling: task lighting that takes 10 minutes to install and zero electrical work. But the shelf at any home store is full of options ranging from $15 to $75 per bar, and the specs on the packaging can feel like a foreign language. This guide decodes the two numbers that actually matter — mAh and LED count — and shows you how to translate them into a real buying decision for a kitchen, pantry, or cabinet refresh.
mAh: The Fuel Tank Metric You Actually Need to Understand
The letters “mAh” stand for milliamp-hours — a unit of electrical charge that tells you how much energy a battery can store. Think of it exactly like a fuel tank: a 2,000 mAh battery holds twice the energy of a 1,000 mAh battery before it needs to top off. In a rechargeable under-cabinet light, that number directly translates to how many hours of illumination you get between charges.
Here’s where it gets practical for a kitchen install. Based on published specs across the current product landscape — which Wirecutter’s 2025 under-cabinet light review and This Old House’s buying guide both document thoroughly — most rechargeable bars fall into three battery tiers:
By the numbers — typical mAh tiers and real-world runtime
| Battery Capacity | Typical Runtime (medium brightness) | Recharge Interval (avg. 4 hrs/day kitchen use) |
|---|---|---|
| 800–1,200 mAh | 4–8 hours | Every 1–2 days |
| 1,500–2,000 mAh | 10–16 hours | Every 3–4 days |
| 2,500–4,000 mAh | 20–35 hours | Weekly or less |
These aren’t manufacturer marketing claims — they’re the runtime patterns that owners consistently report in aggregated reviews on platforms like Houzz and Apartment Therapy’s roundups. The pattern is reliable enough to use as a planning guide.
For a daily-use kitchen, that middle tier (1,500–2,000 mAh) is the practical sweet spot for most households. You’ll charge roughly once a week if the motion sensor is doing its job and not burning the light continuously. Drop below 1,200 mAh and you’re recharging every other day — fine for a pantry that gets opened twice a day, genuinely annoying for a prep counter you use every morning and evening.
For flippers and contractors installing lights across multiple units, the recharge math also affects the first impression a prospective buyer or tenant gets: a dead bar on day three of a showing looks like a defect, not a battery choice. Spec a minimum of 1,500 mAh in any installation where you can’t control post-install behavior.
One caveat: manufacturers sometimes publish “max brightness” runtimes that don’t reflect real-world use. A bar rated for “up to 50 hours” at its lowest dim setting might deliver only 12 hours at the brightness level anyone actually wants in a working kitchen. Cross-reference the mAh number against what reviewers say at medium-to-high brightness — that’s the number that will match your lived experience.
LED Count: More Isn’t Always Better, But Distribution Matters
The second big number on the box is LED count — typically expressed as something like “24 LEDs” or “48 LEDs” along a bar. This one is more nuanced than mAh, because raw count doesn’t tell the whole story. What you’re actually evaluating is a combination of count, spacing, and chip quality.
Here’s the core tradeoff: a bar with 12 high-output LEDs that are evenly spaced across 12 inches will usually outperform a bar with 24 low-output LEDs clustered toward the center. Family Handyman’s under-cabinet lighting overview makes this point directly — they note that visible “hot spots” (bright dots separated by dimmer zones) are almost always a spacing problem, not a count problem.
That said, LED count does give you a rough proxy when comparing bars within a similar quality tier, and it’s the number you have access to on the packaging. A few rules of thumb that hold up across published reviews:
For a 12-inch cabinet span: A minimum of 15–20 LEDs provides even illumination across most countertop tasks. Bars with fewer than 12 LEDs in this width tend to show noticeable hot-spotting that owners flag in long-run reviews.
For an 18–24 inch span: You want 30+ LEDs for consistent coverage. The This Old House guide specifically recommends matching bar length as closely as possible to cabinet width rather than centering a short bar — coverage edge-to-edge matters more than LED count when the bar is too short for the span.
Lumens vs. LED count: Lumens (a measure of total light output — roughly, how much actual brightness a fixture produces) is the more honest spec, but it’s often buried or omitted on budget packaging. When you see it, use it: for kitchen task lighting, the Wirecutter under-cabinet review recommends at least 200 lumens per linear foot of counter. When lumens aren’t listed, LED count is the best proxy you have.
Color temperature is worth flagging here, though it’s a third variable rather than a primary spec. Measured in Kelvin (K), it describes whether light appears warm-white (2,700–3,000K, the yellow tone of incandescent bulbs) or cool-white (4,000–5,000K, the crisper, bluer light common in work environments). For food prep and reading labels, reviewers consistently prefer 3,000–4,000K — warm enough to be pleasant, cool enough to see clearly. Many mid-range rechargeable bars now offer a three-setting color switch; if you’re spec’ing for resale or staging, this flexibility is worth the modest price premium.
Motion Sensor Sensitivity: The Spec Nobody Talks About (But Should)
mAh and LED count are the two specs you came here for, and they’re the right primary filters. But if you’re installing rechargeable bars in a working kitchen or a pantry, motion sensor performance is the third variable that determines whether the system actually behaves the way you expect.
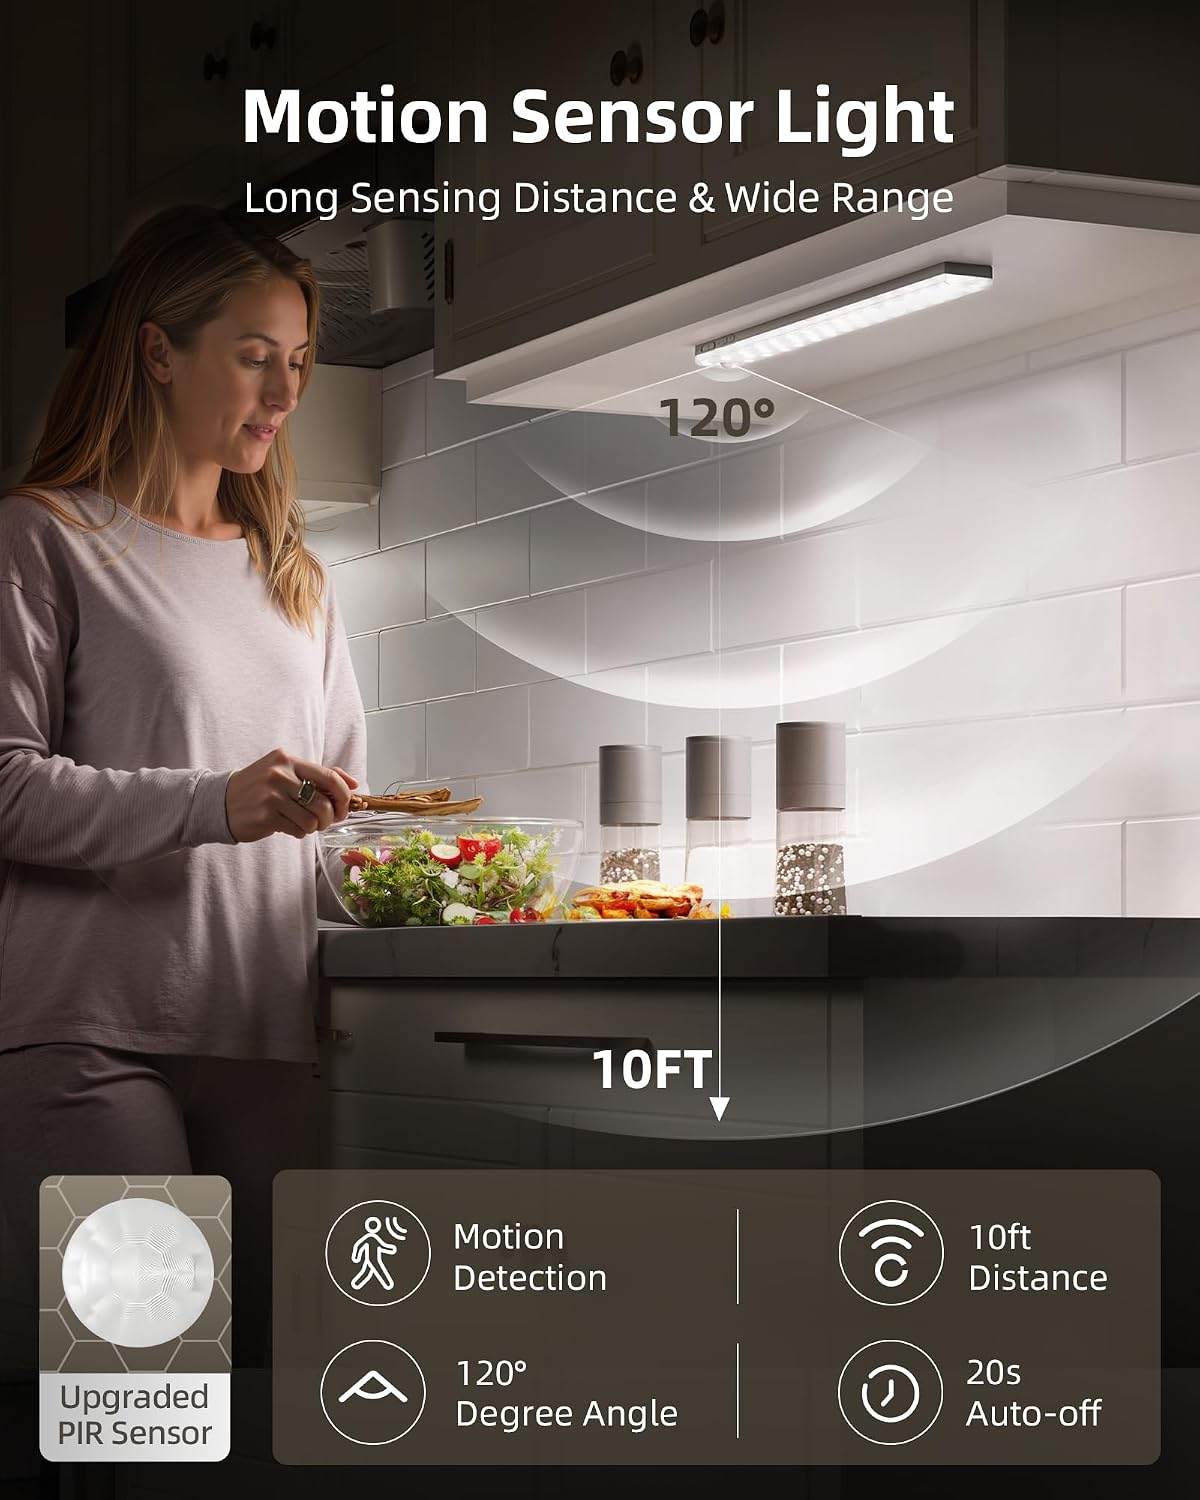
Rechargeable bars use one of two sensor types: PIR (passive infrared, which detects body heat moving through its field) or microwave sensors (which detect movement via radio waves and have a wider detection angle). PIR is more common and more battery-efficient — important when the sensor is running off the same battery that powers the LEDs. Microwave sensors activate more reliably through cabinet doors and at wider angles but drain the battery faster.
The practical specs to look for:
- Detection range: Most bars are rated at 3–6 feet. For a narrow galley kitchen where you’re always within arm’s reach of the counter, 3 feet is fine. For a walk-in pantry where you’re moving around, 6 feet prevents the light from cutting out while you’re still in the space.
- Auto-off delay: The interval before the light shuts off after motion stops — typically adjustable between 15 seconds and 5 minutes. Owners in longer-run Houzz reviews consistently say 30–60 seconds is the sweet spot: long enough that the light doesn’t flicker off between reaching for items, short enough to preserve battery.
- Sensitivity adjustment: Higher-end bars (roughly $40+) let you dial sensor sensitivity down so cabinet vibrations or HVAC airflow don’t trigger false positives. This is a genuine quality-of-life improvement that owners notice after the first week of installation.
Apartment Therapy’s 2025 roundup of battery-powered under-cabinet lights specifically flags “false trigger frequency” as one of the most consistent complaint patterns in owner reviews — worth checking before you dismiss a low-rated product that’s otherwise well-built.
Putting It Together: The Decision Framework
You’re spec’ing rechargeable under-cabinet lights for a kitchen or pantry. Here’s the clean if/then matrix based on everything above:
If it’s a daily-use kitchen counter (prep, cooking, cleaning): Prioritize 2,000+ mAh and 30+ LEDs for a 24-inch span. Don’t go under $30 per bar at this use level — below that price point, the battery and LED quality drop together. Look for a stated lumen output of 200+/linear foot and a color temperature of 3,000–4,000K.
If it’s a pantry or secondary cabinet (occasional access, 1–5 times per day): An 1,200–1,500 mAh bar is genuinely sufficient, and you can shift budget toward LED count and color quality rather than battery size. The auto-off delay matters more here — set it short (15–30 seconds) to preserve charge between infrequent uses.
If you’re installing across multiple units (contractor or flipper context): Standardize on one mid-tier bar (1,800–2,000 mAh, 3,000K, PIR sensor) and install it consistently rather than mixing specs across a project. Owners and buyers don’t notice spec differences between bars; they notice when one bar looks different from another. Consistency reads as quality. At mid-range pricing ($35–$55 per bar), plan for 2–3 bars per standard upper-cabinet run in a 10x10 kitchen — budget $70–$165 per kitchen in materials, which is a rounding error on a project-level P&L but a meaningful upgrade to perceived finish quality.
If the cabinet finish is the star and the lighting is secondary: A lower-profile bar (slim-line designs under 1 inch tall) will be less visible when cabinet doors are open. In this case, prioritize aesthetics and LED spacing over mAh — a slim bar that blends into a painted interior reads better than a chunky high-capacity bar that draws the eye.
The bottom line: mAh tells you how long before you’re hunting for a USB cable, and LED count (cross-referenced against bar length and lumens where available) tells you whether the light actually illuminates the work surface or just the middle of it. Get both specs right for your use case and the rest — motion sensor range, color temperature, price tier — falls into place. Spec them wrong and no amount of attractive fixture design will fix a light that’s dead by Wednesday or spotty at the edges.